Visit our Web Site/ Online Store

If you arrived here from out online store, you can return by clicking right here.

Monday, July 11, 2011

Mint Planters Coming Soon!

Hi everyone!

Well, our mint as finally large enough to transfer some plants to planters to be sold at the markets.

I am so excited to start using our mint! At this time of the year, I am using them all the time!


Applemint


I will be making up planters with Spearmint, Applemint and Peppermint. Look for them at the markets next week!

And I will be posting some recipes using our different mints very soon!

Have a wonderful day and go check out your local Farmer's Market and enjoy FRESH produce and products being offered!

Sunday, July 10, 2011

Attention Foodies!


Hi everyone!

One of the most important goals for this blog is to educate people on herbs. And that includes giving folks ideas of how to use different herbs.

We quickly realized at the Farmer Markets that people want to cook with more herbs but, don’t feel comfortable enough in their knowledge of herbs. Every market we are at, Troy ends up spending a huge amount of his time answering questions and “teaching” people about herbs and their uses.

So, we thought it would be fun to add more recipes using herbs on our DTL Herb blog. And that is where YOU come in! We would love to feature recipes from all you amazing food bloggers and those who just enjoy creating different dishes and blogging about them from time to time.

Our goal is to feature a different blog and that blogger’s recipe using herbs each week. And we need your help! If you write a post with a recipe using herbs and would like to submit if for us to post, we want to know! You don’t need to be an expert on herbs or even a major foodie. We just want the average person out there who is interested in learning and cooking with herbs to have some ideas of recipes.

So, please feel free to email me any of your recipe posts using herbs. We would greatly appreciate it!

Thank you so much!

Now, with all that being said, This is our first post featuring a wonderful blogger, Heather from Life at Willow Cottage. Heather had left a comment on one of our posts over at DTL Herbs and both Troy and I checked out her blog. And what did we see?

06 20 11_6984These amazing mushroom sandwiches! After we stopped drooling, we immediately contacted Heather and said we want to steal use this recipe on our blog! She graciously gave us permission.

These look so fabulous! and I love the idea of a meatless sandwich. Mushrooms give you that whole meat feel to a sandwich. I can’t wait to try this recipe out!

Here is her post in it’s entirety.

Mushroom (Sandwiches) - Part 2

My darling husband and I are going to to on a special date.  We are going out to sit on the dock all by ourselves.  The kids are getting pizza and a movie while we get some alone time to watch the sun go down and peace and quiet.  I am so excited I gave my toe nails a fresh coat of polish!  It's going to be so fun.
So, for our special date, I am making mushroom and goat cheese sandwiches, grilled asparagus, iced tea and strawberries for dessert.  Hubby is on a mushroom kick which is fine by me.  Today, I am going to show you how to make our favorite mushroom sandwiches.  This sandwich is so good.  It is filling and so full of flavor.  Each bite is a flavor explosion in your mouth.  Love that!
So, the board of ingredients is pretty simple.  I am using these nifty little sandwich rolls that hubby picked up at Costco, but you can use any bread you like.

I dug through the entire cheese chest at the grocery store to find the prettiest label.  Then my son used the log of goat cheese as a drum stick and wrinkled it all up!  (Do you have a teenage son that you sometimes feel like choking?  I do.  He is so lucky that I love him so much!)  Anyway, here's the goat cheese. 

Here is a close up of the bread hubby picked.  

Okay, to get started, slice the roll in half and toast it or grill it.  If you are using regular bread, then just them slap onto the grill or in the toaster.  We love grilled bread, but I was not wasting a moment of our time together on running back and forth from the grill.   

Now to make our goat cheese a little more user friendly.  I am using about two ounces for two big sandwiches. 

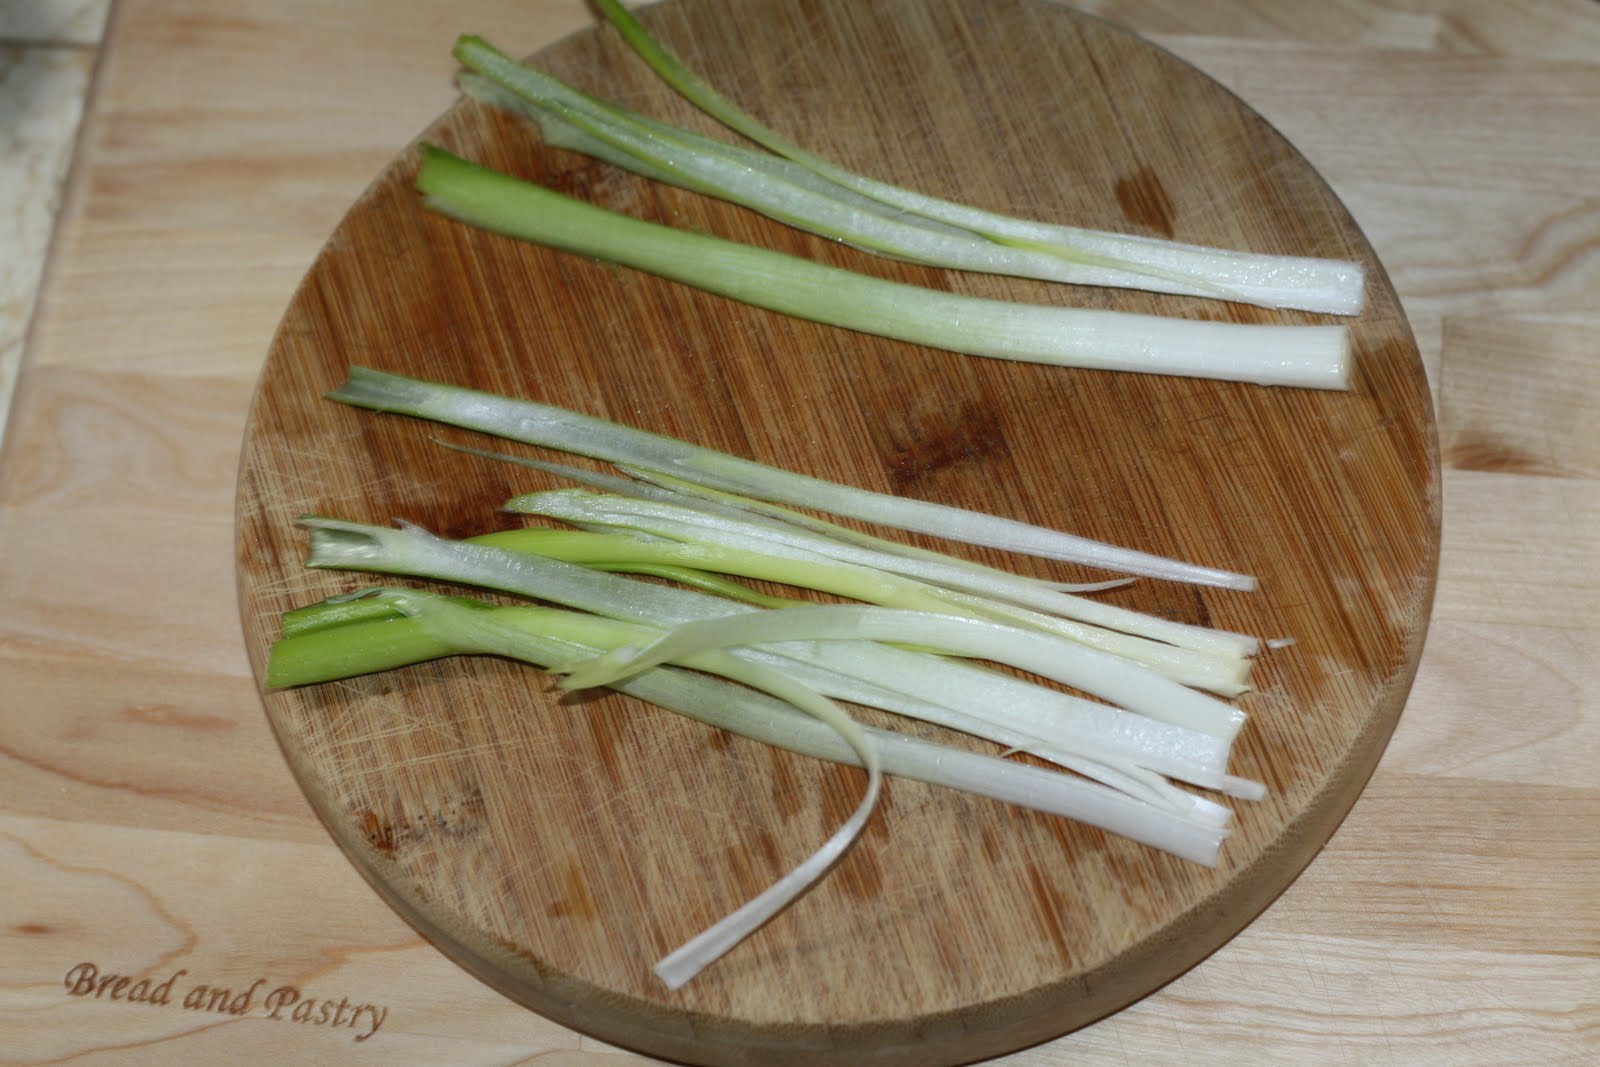
I am going to add lots of yummy things to the goat cheese now.  Some finely chopped green onion is so good.  I cut the green onion in half length wise.  Then each half gets cut again length wise.  Then you slice is width wise to get a finely chopped pile of green onion goodness.   

Add the lovely little green onion bits to the goat cheese. 

Next in are some finely chopped herbs.  I am using chives, sage, basil and thyme.  You can use whatever you like or you can skip this step altogether. 

A tiny pinch of salt and a regular sized pinch of pepper go into the bowl as well.

Finally some skim milk goes in.  The milk is going to thin out the goat cheese.  Start with a little bit of milk (about two tablespoons) and mix it in.  Keep adding milk a little bit at a time until you get the consistency you like.  I thin my mixture down to the viscosity of mayo.  Is mayo viscus?  I think it is.

I forgot to take a picture of the mixture.  Opps.  I'll take a picture next time I make it (tomorrow) and add it in.  :-) 
Now, onto the mushrooms.  See that stem in the middle of the mushroom?  We don't really want to eat that.  It can be woody and tough, so we are just going to grab it and rip right out of the mushroom cap or cut it down so that it does not go past the gills.  

Then flip the cap over.  Give it a drizzle of olive oil and massage in some salt and pepper. 

The mushroom will soak up all the oil as well as the flavor from the salt and pepper. 

Flip the mushroom again and give the gills some olive oil, salt and pepper love. Now your ready to cook this baby up. Here is the link for some cooking instructions.

Now, we have some beautifully toasted rolls waiting for some attention. 

I like to spread a thin layer of goat cheese on each half of the roll.  You can go with a thicker layer on one side if you want. 

This is fresh spinach from our garden.  You can add whatever extra topping you would like.  Provolone, a big slice of tomato, a few rings of red onion, regular lettuce...basically anything you would put on a regular burger is good on this sandwich.   

Then we add our juicy, flavorful mushroom.  I added a few sprigs of thyme to the pan while the mushroom was cooking, but you don't have to do that.

Mushroom love on a plate...or cutting board.  I have to run, cause my fella is waiting for me.  Enjoy!

So, lets recap.  Take some goat cheese.  Add some stuff to it that you like.  I have been known to serve this to my children with only a little pepper and salt added in.  Don't worry about getting to fancy.  Thin it all down with milk.  Stir it up.  Spread it on something toasted.  Eat it.  Love it. 

Thank you so much Heather for this wonderful recipe! You can go directly to the post at Heather’s blog by clicking he link above!

Friday, July 8, 2011

Hi everyone!

Although we have several different places we grow herbs for our herb business, we still  have a lot of beautiful healthy herbs right here at home that we use for our personal use.

And those herbs are blooming left and right. This is another thing why we like to plant more herbs than flowers. They are beautiful and bloom but, they are also edible. Double duty plants! Oh, and let’s not forget the amazing smell right after a rain when the sun hits them! Heavenly!!

Outdoor2011spring 008We have two boxes built in the front of our patio that are filled with wonderful herbs.

Outdoor2011spring 010Beautiful blooms. What you are looking at is Feverfew (small white snowball looking blooms), cilantro (small lacy white flowers), Yarrow ( little white flowers) and  Borage (purple flowers) on this side. Thankfully when the Cilantro bolted, it gave us a bunch of baby plants that are so tasty!

Outdoor2011spring 011The other side has lemon balm, Italian parsley (the white flowers), Lemon Verbena and Orange Thyme

Outdoor2011spring 012In the larger bed that runs about 8 feet along our walkway is blooming French Thyme.

Outdoor2011spring 013And Lemon Thyme.

Outdoor2011spring 014Sage. This so needs to be harvested ASAP!

I did manage to harvest one small area of our three areas of chives.

Outdoor2011spring 007All those at the bottom of this picture are chives. We have the same on the other side.

Outdoor2011spring 029Definitely looking wild and out of control!

I had time to plop my tush down and harvest and clean out one side.

Outdoor2011spring 022Half way done with this side.

Outdoor2011spring 023They are just so sweet.

Outdoor2011spring 026Yay! all done on that side.

Outdoor2011spring 028After sitting there cutting all the chives, I plucked out all the bad ones and the weeds.

Outdoor2011spring 027After a cleaning rinse, I will cut them roughly in half and then just spread them out on the cookie sheet and put them on the dash of one of our trucks. Yup, that is the best way we have found for drying our herbs naturally. We have tried the oven method, the dehydrator method, the hanging in bundles and the paper bag method. We have found this works the very best for us. They will stay in the truck for the next several days. Once dry, they get chopped and stored.

So, this is also my Tip of the week. Even if you grow just a little bit of herbs but, have no idea how to preserve them. Just clip off some, rinse and spread them on a cookie sheet and put in your car to dry. You would not believe how amazing your car smells! Once they are completely dry, just crunch them up and put into a air tight jar. See, it is really no big deal to dry your own herbs!

We add no drying agents or any chemicals what so ever to our herbs. We don’t use any type of chemical  for any reason in growing or harvesting our herbs. Our soil is composted from all natural items. This is absolutely a number one factor in our herb business. Our little Princess has sensitive skin especailly with harsh chemicals and she is one of the main reasons we started this business. She can go out and pluck any herb at any time and eat if she wants. We created a lot of all natural lotions and ointments just for her and now all of us use them. Isn’t that they way things start, out of necessity? 

I hope you enjoyed the little tour with me today. Have a wonderful day!

Monday, July 4, 2011

Composting

I will be doing a presentation on composting at the Wyandotte Farmers Market Thursday July 7, but I wont have nearly enough time to cover everything.

My composting tutorial has appeared on my other blog, but here are some quick links to take you through it step by step.

A step by step tutorial for the beginning composter.


Composting I -What is Compost?

Composting II -Getting Started

Composting III -What to Compost

Composting IV -pH

Composting V - Aerobic vs Anaerobic

Composting VI -Using Compost

Composting Q & A

Wednesday, June 29, 2011

Fresh From The Farmer Market


Hi everyone!


Well, this past weekend was very busy for us. Last year when we decided to take our little our herb business DTL Herbs, to the streets, so to speak, we had no idea how well received we would be. I have grown and used fresh herbs for about 20 years or so. I thought herbs were also just very pretty to have in the yard. When Troy and I got married, we really planted a lot more herbs because we both like to experiment with them in cooking. But, when the princess entered our life, everything took a large turn. We wanted her to understand and become part of something that involved our whole little family from the beginning. She is the “L” in DTL Herbs.


Last year we started the Farmer Markets with fresh cut herbs, dried herbs and plants. By the end of the season we also had dip mixes, dry rubs, salt scrubs, jellies and seasoning packets. This past year, we have worked really hard making, trying out and testing even more products. This season we started out the markets with double the products that we had last year. We also have about 8 times the herb gardens we have planted this year. And now we are constantly in the process of making even more products.


Dundee FM 2011There is a lot of behind the scenes things that need to be done for our business that people don’t realize. One of the biggest things that we need to do is to check out different farmer market venues for our business. This year instead of selling at 2-3 markets, we are selling at 6 markets. That is 6 out of 7 days being spent at the market. However, sometimes you have to take a day off to check out other markets and that is what we did this past weekend.


We had heard that this market was a really successful one. However, last year they already had an herb vendor so we didn’t join them. This year they called us to let us know that they didn’t have an herb person. The biggest problem with this market is that they are an hour away from our home. The market is on Saturday morning from 8-1:00 (which means we need to be there at 7:00 to set up). As most of you can guess, Saturday markets are the best market of the week. Well, our Friday market is the only evening market we have so, that means we would not have anytime between the two busiest markets of the week to make more product if we have to.


So, before we committed, we really had to be sure this is a market good for us. We invited my parents to join us Saturday morning to go and check it out.


page It was a beautiful Saturday morning! And we instantly fell in love with this market! The location and setup was great. The energy level was high and fun.


page1They have a wonderful selection of different vendors. And everyone was happy and enjoying themselves.


page2Each week they have a different type of entertainment. This Saturday was a local “Clogging and Tap” dancing group. They had fun music going and involved the audience. The princess loved it so much that she got up front and watched them doing their dances and started mimicking them. Everyone seemed to enjoy the newest member of the dance club. We were approached later by the dance instructor. She asked if the princess was in a dance class and if not, they would love to have her join them. LOL


Dundee FM 2011 008Dundee FM 2011 011We even bought some new to us herbs. We got a Hot & Spicy Oregano and a Lime Mint.


Dundee FM 2011 012Look at the gorgeous lettuce! My dad bought a huge bundle of each and we split them. They are just beautiful and large bundles. This is one of the best parts of being involved in Farmer Markets. We get all of our produce fresh everyday!


As soon as I got the beautiful lettuce home and cleaned, I made one of my favorites…BLT Finger Salad!


Simple and fresh, here is the super easy recipe:


BLT Finger Salad


Large Leaf Lettuce


Bacon cooked (I like it cooked nice and crispy)


Diced Fresh Tomatoes


The Dressing:


Dundee FM 2011 013Our fresh baby dill in our garden here at home.


1 cup of mayo (I confess, one of the only name brands I am loyal to: Hellman’s mayo!)


1/2 Lemon


1/2 tsp fresh dill


1/2 cup of fresh grated Parmesan cheese


Salt and Pepper to taste


Squeeze fresh lemon juice into the cup of mayo. Then add the rest of the ingredients and mix. It’s best to put in fridge for a couple hours to mix all the flavors.


Spread mayo mix on leaf lettuce. Sprinkle with crumbled bacon and chopped tomatoes. That’s it!


So good and fresh tasting! Just fold and eat. A little messy but, not too bad. :)


Dundee FM 2011 021Dundee FM 2011 022


Edited from original post at The Thrifty Groove

Monday, June 20, 2011

It's Market Time!


Hi everyone!

Well, if you read this blog semi regularly you know that my hubby and I have our own herb business. And this is the major busy time for us. We have had our herbs planted for months in the greenhouse (we start our herbs from seed) and now it is time to get things ready to sell at the markets.

Troy and I spent hours the other day in the greenhouse getting things ready. I have been collecting different thrifted items to use for tabletop herb gardens/planters. So, I spent time putting together these different planters. I thought you may want to see some of them.

Now, keep in mind, I just planted these. So, they are not cleaned up yet and I won't be selling them for a least a week. Why wait? I want the planters to look full and not just planted.

Okay, come on in and join me in the greenhouse!

Farmers market 2011 003These are two little wood tea boxes. I thought they look cute with a little spearmint plant in them. I really tried to do a lot of different sizes and looks of the mini herb gardens. When you are a seller, you want to offer your customers different price points. So, these will be the least expensive ones. **SOLD!

Farmers market 2011 004A large ceramic golf ball planter filled with Basil and Oregano. You might see these planters on Teleflora ads on TV right now for Father's Day. I found this at a thrift store. **SOLD!

Farmers market 2011 005A pretty vintage hobnail milk glass dish with Lemon Balm.

Farmers market 2011 006I chose a beautiful white flowering Basil plant for this wicker watering can that I got at The Christmas Tree Shops. I have another one of these to make up yet. **SOLD!

Farmers market 2011 007I just recently used this old enamel coffee pot on a tablescape I posted. Although I bought it for this purpose, I figured why not use it once before I planted it. I added Marjoram, Oregano, Thyme. **SOLD!

Farmers market 2011 008This will be sold as a set. The vintage green enamelware coffee pot and matching cup (I also have the lid that I will include). I planted Lemon balm in the coffee pot and Spearmint in the cup. the two flavors work great together for a tea or in brewed tea.  **SOLD!

Farmers market 2011 009This is a huge cookie jar (I will include the lid) that I planted with Basil, Thyme and Oregano.

Farmers market 2011 012This little strawberry planter is planted with creeping Thyme and it can be hung.

Farmers market 2011 010This cute tall ceramic jar has Sweet Basil planted (also will include the lid).

We got about 25 more planted containers. I have about 30 more containers to use for various  mini gardens. If they all sell really good (keeping fingers crossed!) I will be racing around every weekend hitting every yard sale I see! LOL Yup, that is actually part of my real life job!

**I wrote this post early last week. So, we have been at a couple of Markets now. So far, so good! Yay! I have made up several other planters that have sold as well. And yes, I am going through some of my fun thrifted finds from over the winter to see what else I can use for planters. I haven’t had time to go to yard sales! Now, did you ever think you would hear those words come out of my mouth? LOL**

I also have other projects for our business going on right now. I will share them at a later time. And several new food items are being added by us. I am excited to see how these go. Casa Chaos is busy, busy, busy these days!

Do you want to take a little tour around the greenhouse?

Let's check out some of our herbs. Now keep in mind this is only ONE area that we have our herbs for our business planted. We have the bulk of our mint here at home, a garden at my parents and a garden plot at a local church. Yes, we are running around like crazy people every day!

Okay, let's look around the greenhouse.

Farmers market 2011 013Potting station.

Farmers market 2011 016

Herbs

Farmers market 2011 017  More Herbs

Farmers market 2011 018You guessed it, more herbs

Farmers market 2011 020Hummmm, could it be even more herbs? :)

Farmers market 2011 021This is part of the hydroponic gardens. Look at that gorgeous Basil!

Farmers market 2011 022Beautiful different lettuce

Farmers market 2011 023Farmers market 2011 025See those big trees in the background? Those are tomato plants that were grown in the hydroponic gardens! Yes, I have been eating fresh tomatoes for awhile now. Yummo!

Well, I hope you enjoyed peeking into my world as of late. Have a fantastic day!

I am also posting this at our Herb blog DTL Herbs

dtlherbsltd

Orignially posted at my blog The Thrifty Groove