Visit our Web Site/ Online Store

If you arrived here from out online store, you can return by clicking right here.
Showing posts with label Cooking. Show all posts

Tuesday, April 3, 2012

Herbed Oil

Hi everyone!

One of the products we created and sell through our company, DTL Herbs LTD is an Herbed Dipping Oil Blend.

IMG_1372

The above picture is from a presentation we did last week about how to use and cook with herbs. What’s the point of going without getting to try yummy treats right? Open-mouthed smile

This product took us awhile to get just right because Troy and I LOVE herbed dipping oil whenever we went to restaurants that served it. We kept the flavors we liked and added the ones we thought would be tasty in it that they didn’t have in theirs.

When we presented this product to our customers last year, it quickly became one of our best sellers! It is always reassuring that our customers like the same things we do! LOL

Besides using it as a dipping oil with yummy chewy bread, we use this product here at home all the time for various things. When I make up the oil, I actually buy a medium bottle of extra virgin olive oil and use a couple of packets of the herbed dipping oil. This bottle stays near the stove all the time.

Instead of using plain olive oil whenever we cook, we use the herbed infused oil instead. It gives eggs, potatoes, pasta and whatever else that extra little herb flavor. Delish!

So, our Herbed Dipping Oil is not just for dipping bread into. Use it in all your cooking that needs some oil. It is also great brushed over homemade bread or rolls! I love to use it when I open a refrigerated package of biscuits or croissants, just brush the oil over before baking.

For those of you that don’t have access to our products (which we are still working on changing that and opening an online store as soon as we can!) you can certainly create your own Herbed Dipping Oil. Just play around and add the savory dried herbs that you like. It’s a trial and error type of thing until you get it the way you want. Believe me, WE know! LOL

You can create a Herbed Dipping Oil with fresh herbs if you like. However, you need to know that if you use fresh herbs you can only keep it for a couple of days in the fridge.

A fresh herb oil blend should be made only when you plan to use it all immediately!

Why you ask?

Fresh herbs contain trace amounts of water or moisture. The oil won’t support bacterial growth but, even the smallest trace of water will.  Botulism bacteria flourishes in this environment. Even in a sealed bottle. And please remember garlic is an herb and is one of the most moisture filled of the herbs.

Now I know what you are thinking, “Um, Diann? I see garlic in olive oil all the time at the store.” Yup, you do. However, commercial garlic (and or herb) oil products have been preserved prior to immersing onto the oil.

The way it is done commercially is to first preserve the water-containing garlic, herb, etc. with a strong brine or vinegar solution, then put it in the oil. The vinegar solutions used commercially are up to 4 times stronger than the vinegars you find in the supermarket.

So, have fun and play with herbed oils. They add great flavor to so many dishes!


Whole Food Wednesday

Sunday, April 1, 2012

Herb Infused Iced Tea

Hi everyone!

Last week we gave the last of the 3 part presentation at Roosevelt High School. This presentation was about using herbs.

Since we have started our herb business we have discovered that people can be a bit confused about herbs. It is not an area everyone feels comfortable when it comes to using them.

After spending a huge amount of time educating folks at the Farmers Markets about herbs and then having many requests from organizations to speak about how to use herbs, we finally added this as a part of the presentations we now offer.

If you are not familiar with how to cook or bake with herbs, I believe it is best to keep it simple. Just add a little here and there until you start to find out what you like.

So, for this last presentation I prepared some very simple treats for everyone to try.

This post is going to show you how to do a simple Herb Infused Iced Tea.

IMG_1375

Now, this is NOT herbal tea. This is a black tea infused with herbs. And “infused” means all the tea and herbs were NOT boiled.

How to:

Boil a kettle of water

In your pitcher add 5 bags of your favorite black tea. (Most common teas are black tea or a mix of)

Add in the pitcher a Tablespoon of dried Peppermint

Add 1 1/2 teaspoon of Dried Lemon Balm

Add one heaping teaspoon of Dried Stevia

IMG_1366

Stevia is a natural sweetener and is basically calorie free.

Pour boiling water into the pitcher and let steep for about 30 minutes. The longer it steeps, the stronger the flavor.

**If you don’t have the dried herbs, you can use fresh herbs. Generally that means you need to use 2 to 3 times the amounts. And make sure you crush up (bruise) all the leaves to release the oils.**

Next double a piece of cheesecloth across the pitcher and strain into another pitcher. You can do this twice if you want but, generally by doubling the cheesecloth, once is enough.

Now refrigerate and enjoy!

Remember, you can try different herbs that you like in making an Herb Infused Tea. Play around with any of the mints and “Lemon” herbs (Verbena or Thyme). And you can use the same recipes to make a Hot Herb Infused Tea.

I will be sharing more fun and easy things that I made using herbs at this presentation in the coming week so, stop back by!


For more great recipes, check out these parties I am joining:
Slightly Indulgent Tuesday
Tasty Tuesday

Thursday, March 8, 2012

Love Seeing the Fresh Parsley!


Hi everyone!

Everyday we have to check out our herb beds and see what is popping up. A lot of our herbs never really went dormant due to the mild winter we have had. So, we have some life in our beds.

I was out cleaning up the beds a bit and saw all this beautiful green parsley.

IMG_0883 Do you have parsley in your gardens?

We use a lot of parsley around here. And a lot in our herb products.

Parsley (Petroselinum hortense)

Garden parsley is a bright green hairless herbaceous plant in temperate climates, an annual herb in sub-tropical and tropical areas.

Parsley grows best in moist, well drained soil, with full sun. However, the parsley I showed you in the picture is in a rather shaded area. In a good sunny day, it may get only 3-4 hours of sun at the most. So, I guess we are breaking the “sun” rules a bit in our herb bed.

Parsley has many cultivars such as:

Leaf parsley

Parsley plant, Crispum Group

In cultivation, Parsley is subdivided into several cultivar groups depending on the form of the plant, which is related to its end use. These are often treated as botanical varieties but are cultivated selections, not of natural botanical origin.

The two main groups of parsley used as herbs are curly leaf (i,e) (P. crispum Crispum Group; syn. P. crispum var. crispum) and Italian, or flat leaf (P. crispum Neapolitanum Group; syn. P. crispum var. neapolitanum); of these, the Neapolitanum Group more closely resembles the natural wild species. Flat-leaved parsley is preferred by some as it easier to cultivate, being more tolerant of both rain and sunshine, and has a stronger flavor (though this is disputed]), while curly leaf parsley is preferred by others because of its more decorative appearance in garnishing. The produce code for parsley is 4899. A third type, sometimes grown in southern Italy, has thick, celery-like leaf stems.

220px-Wurzelpetersilie_Wurzel

Root parsley

Root parsley

Another type of parsley is grown as a root vegetable, the Hamburg root parsley (P. crispum Radicosum Group, syn. P. crispum var. tuberosum). This type of parsley produces much thicker roots than types cultivated for their leaves. Although seldom used in Britain and the United States, root parsley is very common in central and eastern European cuisine, where it is used in soups and stews.

Even though root parsley looks similar to the parsnip, it tastes quite different. Parsnips are among the closest relatives of parsley in the family Apiaceae, but the similarity of the names is a coincidence, parsnip meaning "forked turnip"; it is not closely related to real turnips.

Companion plant

Parsley is widely used as a companion plant in gardens. Like many other members of the carrot family (umbellifes), it attracts predatory insects, including wasps and predatory flies to gardens, which then tend to protect plants nearby. For example, they are especially useful for protecting tomato plants as the wasps that kill tomato hornworms also eat nectar from parsley. It offers protection even in its first year as the strong scent of the parsley leaves appear to mingle with the tomato scent and confuses the tomato moth

Source

Parsley is used all around the world as an essential herb. In the culinary world it is used in everything from meat, fish and chicken dishes to soups, stews and salads.

And of course parsley is a big part of the European Bouquet Garni. we have been work on creating a Bouquet Garni to sell at the markets. The hardest part we are dealing with is the proper packaging. I think packaging is always are biggest stumbling block for our products. But, we think this would be a great item for us to sell because it will give the customers all the different herbs at one time without them having to buy them individually. So, folks, we are working on this!

Nutritional value per 100 g (3.5 oz)

Energy
151 kJ (36 kcal)

- Sugars
0.9 g

Fat
0.8 g

Thiamine (vit. B1)
0.1 mg (9%)

Niacin (vit. B3)
1.3 mg (9%)

Vitamin B6
0.1 mg (8%)

Vitamin C
133.0 mg (160%)

Calcium
138.0 mg (14%)

Magnesium
50.0 mg (14%)

Potassium
554 mg (12%)


Carbohydrates
6.3 g

- Dietary fibre
3.3 g

Protein
3.0 g

Riboflavin (vit. B2)
0.2 mg (17%)

Pantothenic acid (B5)0.4 mg (8%)

Folate (vit. B9)
152 μg (38%)

Vitamin K
1640.0 μg (1562%)

Iron
6.2 mg (48%)

Phosphorus
58.0 mg (8%)

Zinc
1.1 mg (12%)

Percentages are relative to US recommendations for adults

Source

Thursday, February 23, 2012

A Touch of Flowering Beauty

Hi everyone!

Last year, at the markets, we used a couple of 5 gallon buckets planted with different herbs to help hold down our canopy. One of the buckets had a sage plant in it.

If you grow or have ever grown sage, you know it is one hardy plant. After the market season was over. We took the bucket to the greenhouse. And of course it is growing beautifully.

Another wonderful part about growing sage is it has the prettiest delicate purple flowers.

IMG_0724

It is so nice to see flowering blooms at this time of the year!

IMG_0724

And don’t forget, the pretty little sage flowers are edible. They have a more subtle taste than the leaves. Adding them to a fresh garden salad would not only taste good but, the soft purple color would add a wonderful visual contrast to all the greens.

These little flowers are also lovely floating in a cup of hot tea. The flavor would be very mild and you could still get the effects that sage has to offer. When we have a sore throat or congestion, I always add a bit of sage to our tea. It has always had a soothing effect.

Sage,(Salvia Officinalis), is referred to as the herb of longevity. Although best known as an ingredient in poultry stuffing, Sage(or edible sage/garden sage) has been used medicinally for thousands of years. In the Middle ages, Sage was thought to promote longevity. One legend says its healing comes directly from the Virgin Mary.

Native to the Mediterranean region, its name comes from the Latin Salvare, which translates roughly as "to rescue" or "to heal." Sage is often used as a remedy for respiratory infections, congestion, cough, sore throats, appetite stimulant, indigestion and is said to have a beneficial effect on the liver. It is also given for fever, night sweats and urinary problems. Some women even find that it helps with menopausal symptoms.

Sage is a uterine stimulant, so it should be avoided in therapeutic doses during pregnancy. It is safe to use in cooking however. It may also decrease milk production so nursing mothers be aware of that. Gargling or swishing the tea without swallowing should not lead to this effect.

Source

When you plant your herbs remember they also can add color to your garden. Most herbs have beautiful flowers. Since we grow more than just one of each plant, I try to let one flower to see the pretty blooms and to use them in different ways.

We are joining  Fertilizer Friday.

Sunday, February 12, 2012

Herb of The Year: Rose

Hi everyone!

rose9

Does that surprise you? The herb of the year is the Rose? It surprised me when I heard about it last summer! I never think of a rose as an herb. However, if we refer back to the definition I posted:

What the word “herb” really means
A very fitting definition that defines herbs by their usefulness rather than by their appearance or botanical structure was coined by Holly Shimizu, director of the U.S. Botanic Garden. Holly says, ―Herbs are defined as plants (trees, shrubs, vines, perennials, biennials or annuals) valued historically, presently, or potentially for their flavor, fragrance, medicinal qualities, insecticidal qualities, economic or industrial use, or in the case of dyes, for the coloring material they provide.

Roses definitely fit into that category.

**Very Important: ONLY use culinary roses. NEVER use roses from a florist. They are treated several times with chemicals. Use the roses you grow if you do not use chemicals on them or look for local organic growers.**

Culinary Use

Rose petal and rose hips are used a lot to make jams, jellies, cordials, vinegars and sweets. Rose flavoured Turkish delight has been produced in Turkey since the 15th century and is known there as lokum.

Rosehip syrup is a natural source of vitamin C, containing 20 times more vitamin C than oranges by weight.

rose7

Recipe - Rose Vinegar

I found this recipe for treating mild headaches and as a gargle for sore throats. It's also good to use as a facial toner.

Quantities
  • 3 Handfuls Fresh Highly Scented Rose Petals (red or deep pink give the best colour).
  • 7 Tbsp's Distilled White Vinegar.
  • 1 Tbsp Rose Water
  • 1 Pint Distilled Water.
Method
  • Place the rose petals in a glass container and add the wine vinegar
  • Leave the container in a cool, dark place for 1 week, shaking the liquid every day
  • Strain through a muslin cloth and discard the petals
  • To use, dilute the 1 Tbsp of rose vinegar with 1 pint of waterSource: Herb Society.org

page

I will be sharing different things I try with roses this year. There are so many fun and interesting uses for them. Who knew?

Sunday, July 17, 2011

Guest “Chef” Emily from The French Hutch!


Friday, July 15, 2011

Hi everyone!

Oh, I have a treat for  you today! Emily at The French Hutch is our featured guest "Chef" today! Emily has created not one but a couple of mouth watering recipes to share with us. Thank you Emily for such wonderful recipes and drool worthy photos!

IMG_0727 Click the above picture of Emily’s beautiful French Hutch to go to her blog!


ITALIAN BRUSCHETTA ~ WITH FRESH HERBS AND TOMATOES

My post this week will be the Weekly Featured Recipe at DTL Herbs. Please join Diann from The Thrifty Groove and me at her herb blog sharing great recipes using fresh herbs.

Thank You Diann, I am honored  to have my recipe featured at DTL Herbs.

please click here to join Diann at her new blog

BRUSCHETTA

Summer months you will always find in my kitchen fresh herbs from my little herb garden and home grown tomatoes from family or friends. My sweet dad always had these growing in a garden in our back yard so its from these fond memories I love and enjoy preparing any recipe using tomatoes. When my sources run out for suppling me with what I feel is a summer staple, I head to the huge farmers market in Birmingham. I know I'll always find tomatoes and most any herb I need there.
I think I started to go apes over bruschetta after my first trip to Roma.  We have a favorite restaurant where Jim and I always enjoy dining, I always order the bruschetta as an appetizer, from orders by the waiters who always remember us and tell us what to eat, oh those Italians! In Roma, the bruschetta is different than what we found in Florence and the Tuscan hill towns. Roma offers up its version with chopped tomatoes, basil and thicker bread for the oil and vinegar to soak into, where the Tuscan version uses thiner slices of bread and is more of a finger food. Roma serves bruschetta like a salad and you need your fork and knife. I love both, but it can get a little messy eating as finger food. I like serving it as a first course replacing the salad.  Either way, its a summer favorite, a staple you'll find on my menu while the tomatoes are garden fresh and herbs are out of my back yard garden. Ah, the wonderful bounty of summer.

WHAT YOU'LL NEED


~

FRESH CHOPPED BASIL

FRESH CHOPPED ROSEMARY

CLOVE OF GARLIC / OR SWEET ONION

YOUR FAVORITE FRESH OR DRIED HERB

FRESH CHOPPED AND/OR SLICED TOMATOES

FAVORITE OIL AND VINEGAR

FRESH GROUND SEA SALT AND PEPPER

YOUR FAVORITE BAGUETTE BAKERY BREAD

~


BEAUTIFUL GARDEN FRESH HERBS

DRIED IF FRESH IS NOT IN SEASON

DRIED BRUSCHETTA HERBS

PURCHASED IN POSITANO

BLUE BASIL
BLUE CENTER

HOME GROWN TOMATOES

GRILL OR TOAST BREAD

A PRETTY FRENCH ROOSTER PLATE

RUB BREAD WITH GARLIC OR ONION

ADD HERBS TO TOMATOES

~

CHOPPED FOR ROMA BRUSCHETTA

SLICED FOR RUSTIC

TUSCAN BRUSCHETTA

TOP BREAD WITH TOMATOES AND HERBS

POUR OIL OVER TOMATOES

AND ONTO PLATE AROUND BREAD

ADD VINEGAR

ENJOY YOUR FAVORITE BRUSCHETTA

DELICIOUS


POSTCARDS FROM ROMA


GEORGIE, JIM, EMILY AND MOUNIR

BRUSCHETTA AT TUDINI'S IN ROMA

THE REAL DEAL

LEMONCELLO
AFTER DINNER DRINKS

TOMATO, FRESH MOZZARELLA AND BASIL SALAD
JUST ADD YOUR FAVORITE OIL, VINEGAR AND HERBS


Really there is no right or wrong way to make bruschetta. I love the two ways presented here, the way I first tried it in Roma. It just doesn't get any better.........CIAO!

Sunday, July 10, 2011

Attention Foodies!


Hi everyone!

One of the most important goals for this blog is to educate people on herbs. And that includes giving folks ideas of how to use different herbs.

We quickly realized at the Farmer Markets that people want to cook with more herbs but, don’t feel comfortable enough in their knowledge of herbs. Every market we are at, Troy ends up spending a huge amount of his time answering questions and “teaching” people about herbs and their uses.

So, we thought it would be fun to add more recipes using herbs on our DTL Herb blog. And that is where YOU come in! We would love to feature recipes from all you amazing food bloggers and those who just enjoy creating different dishes and blogging about them from time to time.

Our goal is to feature a different blog and that blogger’s recipe using herbs each week. And we need your help! If you write a post with a recipe using herbs and would like to submit if for us to post, we want to know! You don’t need to be an expert on herbs or even a major foodie. We just want the average person out there who is interested in learning and cooking with herbs to have some ideas of recipes.

So, please feel free to email me any of your recipe posts using herbs. We would greatly appreciate it!

Thank you so much!

Now, with all that being said, This is our first post featuring a wonderful blogger, Heather from Life at Willow Cottage. Heather had left a comment on one of our posts over at DTL Herbs and both Troy and I checked out her blog. And what did we see?

06 20 11_6984These amazing mushroom sandwiches! After we stopped drooling, we immediately contacted Heather and said we want to steal use this recipe on our blog! She graciously gave us permission.

These look so fabulous! and I love the idea of a meatless sandwich. Mushrooms give you that whole meat feel to a sandwich. I can’t wait to try this recipe out!

Here is her post in it’s entirety.

Mushroom (Sandwiches) - Part 2

My darling husband and I are going to to on a special date.  We are going out to sit on the dock all by ourselves.  The kids are getting pizza and a movie while we get some alone time to watch the sun go down and peace and quiet.  I am so excited I gave my toe nails a fresh coat of polish!  It's going to be so fun.
So, for our special date, I am making mushroom and goat cheese sandwiches, grilled asparagus, iced tea and strawberries for dessert.  Hubby is on a mushroom kick which is fine by me.  Today, I am going to show you how to make our favorite mushroom sandwiches.  This sandwich is so good.  It is filling and so full of flavor.  Each bite is a flavor explosion in your mouth.  Love that!
So, the board of ingredients is pretty simple.  I am using these nifty little sandwich rolls that hubby picked up at Costco, but you can use any bread you like.

I dug through the entire cheese chest at the grocery store to find the prettiest label.  Then my son used the log of goat cheese as a drum stick and wrinkled it all up!  (Do you have a teenage son that you sometimes feel like choking?  I do.  He is so lucky that I love him so much!)  Anyway, here's the goat cheese. 

Here is a close up of the bread hubby picked.  

Okay, to get started, slice the roll in half and toast it or grill it.  If you are using regular bread, then just them slap onto the grill or in the toaster.  We love grilled bread, but I was not wasting a moment of our time together on running back and forth from the grill.   

Now to make our goat cheese a little more user friendly.  I am using about two ounces for two big sandwiches. 

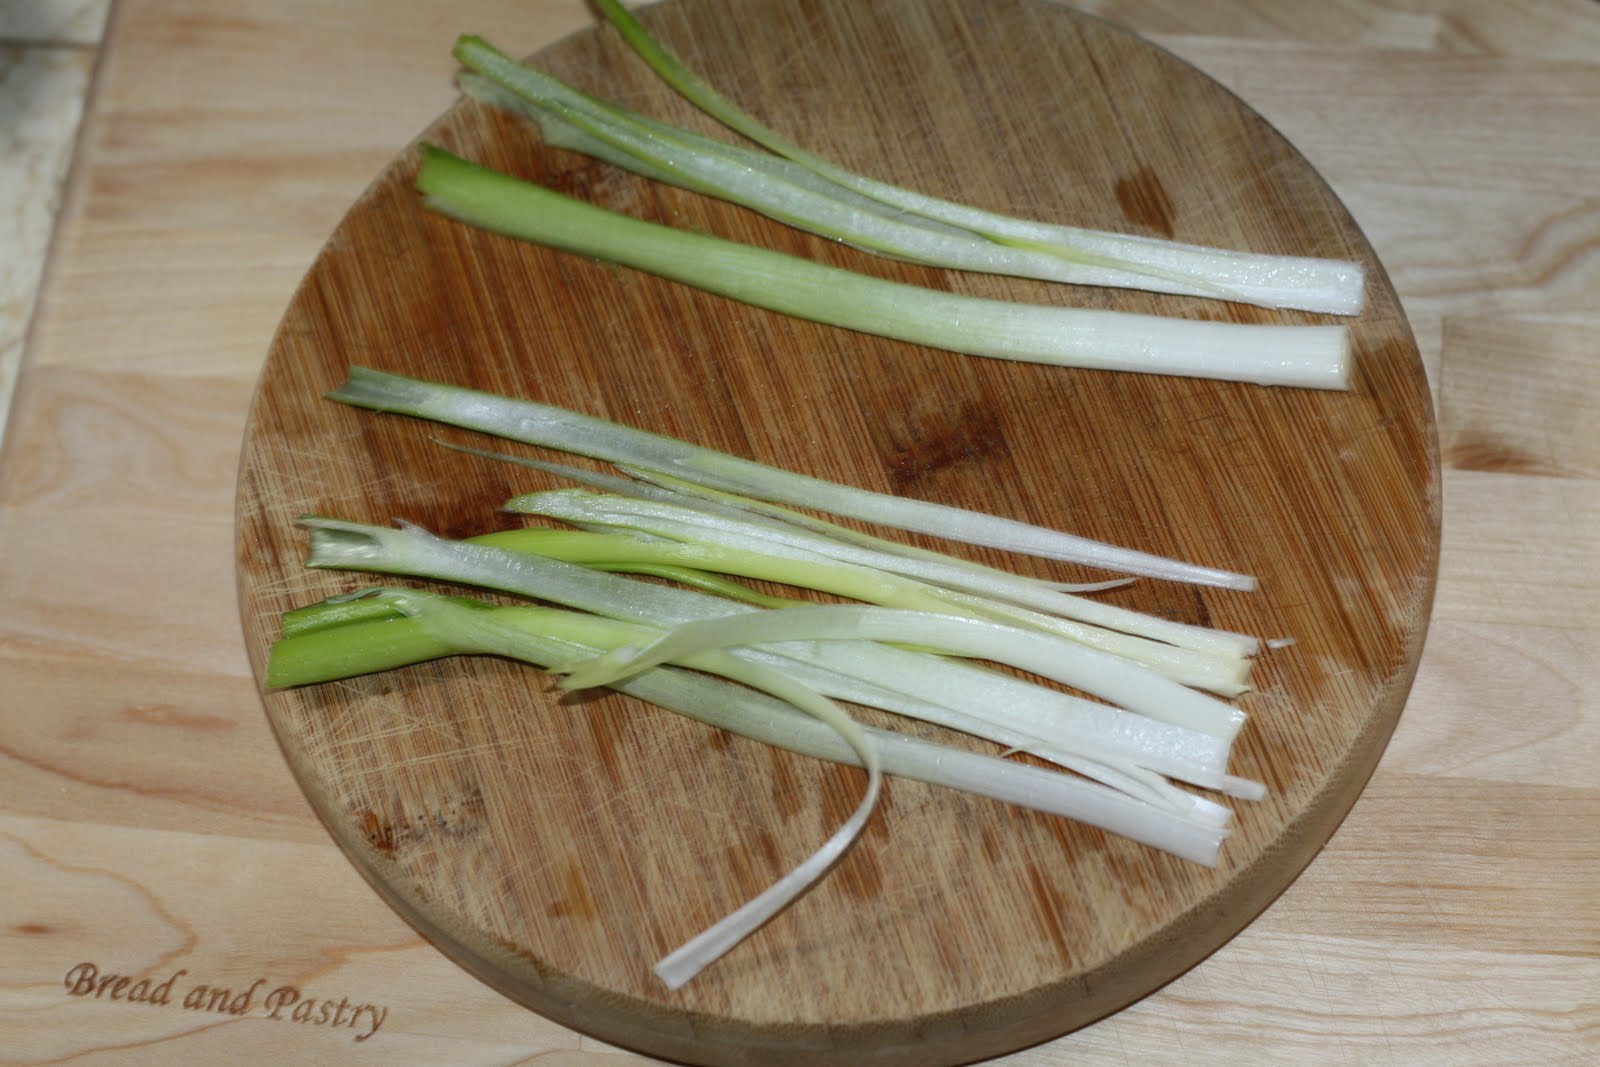
I am going to add lots of yummy things to the goat cheese now.  Some finely chopped green onion is so good.  I cut the green onion in half length wise.  Then each half gets cut again length wise.  Then you slice is width wise to get a finely chopped pile of green onion goodness.   

Add the lovely little green onion bits to the goat cheese. 

Next in are some finely chopped herbs.  I am using chives, sage, basil and thyme.  You can use whatever you like or you can skip this step altogether. 

A tiny pinch of salt and a regular sized pinch of pepper go into the bowl as well.

Finally some skim milk goes in.  The milk is going to thin out the goat cheese.  Start with a little bit of milk (about two tablespoons) and mix it in.  Keep adding milk a little bit at a time until you get the consistency you like.  I thin my mixture down to the viscosity of mayo.  Is mayo viscus?  I think it is.

I forgot to take a picture of the mixture.  Opps.  I'll take a picture next time I make it (tomorrow) and add it in.  :-) 
Now, onto the mushrooms.  See that stem in the middle of the mushroom?  We don't really want to eat that.  It can be woody and tough, so we are just going to grab it and rip right out of the mushroom cap or cut it down so that it does not go past the gills.  

Then flip the cap over.  Give it a drizzle of olive oil and massage in some salt and pepper. 

The mushroom will soak up all the oil as well as the flavor from the salt and pepper. 

Flip the mushroom again and give the gills some olive oil, salt and pepper love. Now your ready to cook this baby up. Here is the link for some cooking instructions.

Now, we have some beautifully toasted rolls waiting for some attention. 

I like to spread a thin layer of goat cheese on each half of the roll.  You can go with a thicker layer on one side if you want. 

This is fresh spinach from our garden.  You can add whatever extra topping you would like.  Provolone, a big slice of tomato, a few rings of red onion, regular lettuce...basically anything you would put on a regular burger is good on this sandwich.   

Then we add our juicy, flavorful mushroom.  I added a few sprigs of thyme to the pan while the mushroom was cooking, but you don't have to do that.

Mushroom love on a plate...or cutting board.  I have to run, cause my fella is waiting for me.  Enjoy!

So, lets recap.  Take some goat cheese.  Add some stuff to it that you like.  I have been known to serve this to my children with only a little pepper and salt added in.  Don't worry about getting to fancy.  Thin it all down with milk.  Stir it up.  Spread it on something toasted.  Eat it.  Love it. 

Thank you so much Heather for this wonderful recipe! You can go directly to the post at Heather’s blog by clicking he link above!